I managed to get a good game in of Battlegroup Overlord last night. It is such a great set of rules. I pitted a US infantry platoon against a Wehrmacht platoon with support to see if I could finally get a German victory in one of my games. I promised I wouldn't fudge any dice rolls.
US Battlegroup:
1x US infantry platoon, upgraded to regular.
1x MMG team. (The platoon itself is the only thing that gets upgraded to regular when you do the upgrade. I have been playing this wrong the whole time)
1x Bazooka team
1x M4 Sherman platoon, with one upgunned to a 76mm.
1x M8 Greyhound - to try and win the scout battle.
1x US Recon patrol (a normal infantry squad and a normal BAR squad, but with the scout rule).
They also have 2x 81mm mortars off board, and a pre-timed 105 barrage.
Wehrmacht Battlegroup:
1x infantry platoon, upgraded to veteran.
1x HMG MG42 team
1x Panzerschrek team
1x Pak 40 with a loader team
1x Puma
1x Panther
1x Jagdpanzer IV
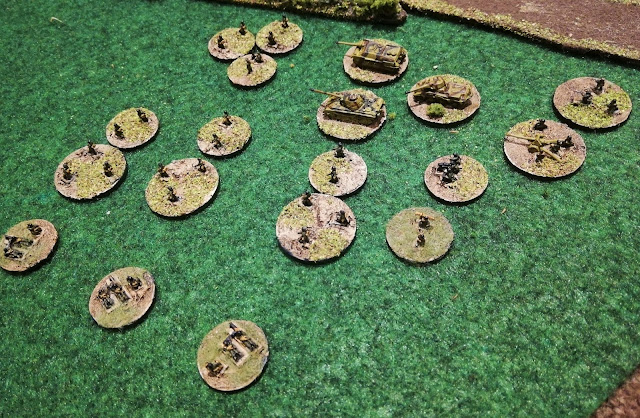
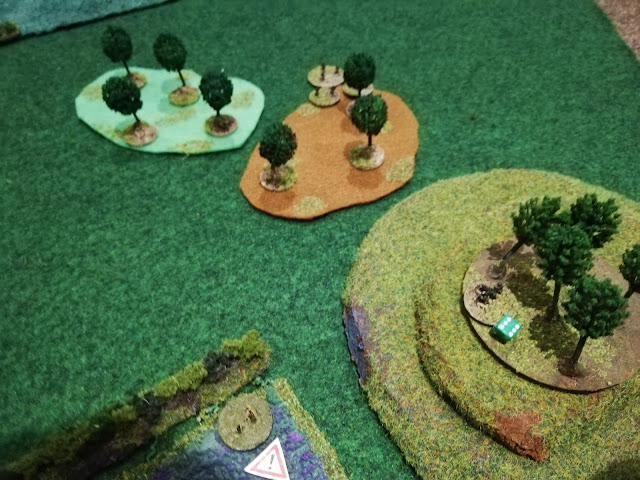
A recon flight shows the lay of the land. US infantry attacking from the north. Germans hold a line in the middle. There are three objectives: the copse on the hill; the farm house in the centre; and the farm complex on the left flank.
As the Americans have more recon units than the Germans, the Germans are forced to already pull a chit towards their Battle Rating. I also think the Americans might have been supposed to pull a chit also as the Germans are sitting on the objectives.
The Puma scout car prowls on the left flank, ready to advance and spot for any other German units. Ahead is an MG42 team along with an infantry squad. They are covering the road and field. A Pak 40 covers the road and open ground on the centre and right flank.
Another MG42 squad hold the centre, while the Jagdpanzer IV lies in wait behind the hedge. Another squad, a Panzerschrek team and another HMG team cover the right flank. The HMG team is atop the hill, in the cover of the copse. The Panzershrek team, however is pinned by a pre-game bombardment.
The advance US forces consist of the recon patrol advancing up the left flank, the M8 Greyhound in the centre there, along with the command squad who are taking cover behind the farm complex. A squad and BAR team advance up the right.
Turn 1
The opening shots ring out as the BAR team hugs the hedge line and opens fire at the German infantry. One unlucky Gefreiter is caught in the open. The GIs advance further behind the cover of the woods. The Jagdpanzer IV lies in ambush.
The Greyhound advances with the recon troops and takes a shot at the Puma, scoring a direct hit! It bursts into flames and will remain there, a funeral pyre for those unfortunate enough to not escape. This is an excellent start for the US attackers.
However, while manoeuvring again, the M8 hits a landmine! Luckily it does no damage, only shakes the crew who take some time to recover their morale.
This was the chit the Germans pulled for the loss of the Puma. This seems to happen quite often.
The BAR team gets caught in a crossfire by the infantry squad and an MG42. The squad is wiped out.
I forgot the rule where you can retreat from fire. Also, the Panzerschrek team will remain pinned for ages, because I don't want to risk pulling a chit for just one unit who don't even have a job right now. There is no armour for them to kill, apart from the Greyhound.
The Wehrmacht infantry on the left flank attempt to pin the Greyhound but fail.
Turn 2
The US recon squads open fire and wipe out the MG42 team. More success for the US forces. Meanwhile the Greyhound rushes up, past the defending infantry in an attempt to hook around and wreak havoc in the German rear. The command squad take shelter inside a barn to better coordinate the attack.
The US squad on the right flank advances further towards the hill, in order to take the objective, take the hill and try to lay down fire against the flanks of the German defenders.
Worried about their flank, the remaining German squad manages to pin down the US recon infantry! It is an incredible feat!
Worried about the Greyhound, and with no other targets, the Pak 40 crew turn the gun and readjust their position. They then send a shot at said Greyhound...
...blasting it to pieces. The unlucky crew didn't even know what happened. Mearnwhile, the Jagdpanzer IV still lies in wait, waiting for juicy targets.
Turn 3
The US commander calls in a few rounds from the 81mm mortars. While the spotter round lands way off target, the Pak 40 team and forward infantry squad come under fire. The infantry make it through, but the Pak 40 gets destroyed, many crew are lost with the remaining men running away!
The US infantry on the right flank assault the advancing German squad! It is chaos in the woods, heavy casualties on each side. The Germans are wiped out, while the Americans who are left completely lose the the will to fight, break and run.
On the left flank the recon squads lay down withering fire on the German infantry, killing a few and sending the rest running. Things are not looking good for the Germans, especially with US reinforcements beginning to enter the combat area.
This was making me sad. Another German defeat on the way.
Shermans come onto the battlefield. One advances up the right flank and attempts to use HE to dislodge the MG42 team. However, they were well dug in and avoided taking loses.
A high velocity round pings past an advancing Sherman. They react by trying to drive into cover, but a second round punches through the side of the hull, setting the tank ablaze. His platoon mate, the Sherman 76 advances up past the burning hulk, trying to get into cover also.
I feel like I may have missed a turn here. I struggle to believe the game ended in Turn 3.
The German Panzershrek team, finally unpinned (for a 5 chit!) advances up the side of the hill to engage the Sherman. The team bravely takes aim, fires, and blows the Sherman up. Panzerknacker indeed.
This now brings the US commander dangerously close to his BR. A loss on either side could pretty much break either side.
The loss comes as the Jagdpanzer IV engages the third Sherman, destroying it with ease. The remaining US forces begin a fighting withdrawal, while the German commander takes breath and appreciates how close his Battlegroup came to having to retreat themselves.
Good game this. I am glad the Germans won. I had fun with my Jagdpanzer IV. Although, it only has six shots! I might need to look into resupply units now. The off board mortars were fun and did a lot of damage. It was also nice to see a Pak 40 in action as I had yet to use one. Now to finish up my 88.
It was quite straight forward setting this game up and playing, although I was quite slow because I needed to refresh the rules after six months. I want to aim to play a game at least once per month. I liked making army lists, although with my limited miniatures, there isn't loads I can do. And I don't really want to have games larger than a platoon or so.
I have this ever growing shopping list of miniatures that I want to buy, but that is all on hold for a while. I have to do that scary thing where I, as a miniature painter, I paint the miniatures that I have, and don't buy new, shiny things on a whim.


No comments:
Post a Comment