Thursday, 27 June 2013

Boys and Old Men

Almost a year ago I mistakenly bought some Volksturm thinking they were Volksgrenadiere. I decided I would paint them up and just keep them in a box just in case I ever needed them. On a whim I took a dozen to see what would happen if I based them and shaded them without bothering to touch them up at all. It seems to have worked well. I am not sure of the make of the men. There are definitely two brands here, and I would guess at SHQ and Skytrex. But I can't be certain.

My infantry painting is only held up by my lack of pennies on which to base them. I use any cheap brand of wall crack filler to attach the figure, I then sprinkled cat litter on these bases to look like the rubble of Berlin.


My first Russians.

I finally managed to decide on a colour scheme for my Russians. I was then able to quickly paint some up and prepare them for spraying. I put together just one sprue of the PSC infantry pack, and the support weapons pack. Here are the results:


Wednesday, 26 June 2013

Pak 40 from Italeri

I bought the two-pack a while ago. The guns clipped together really nicely. I dabbed a little super glue on some places to strengthen. Unfortunately I wasn't paying attention and I put the limbs on incorrectly on one of the guns. I don't really know which, though. The guns and crews languished for months, unpainted, while I decided whether to switch to acrylics or not. I made the switch, and they were the first things I used a spray to undercoat.

I only took pictures of one gun...because they look the same. I chose not to base the crew and gun together. I am not sure why.


Tuesday, 25 June 2013

Anti-Shine purchased. Troops finished.

I have been adding to this mass of infantry for a couple of months now. I ran out of matt varnish spray a while ago, and have not had time to replenish my supplies. So I would complete soldiers, quick-shade them, and put them in my "to be sprayed" box. I picked some spray up this morning, and can finally post what I have been working on.

It is infantry galore. Germans, all of the PSC variety. Support weapons too! Support weapons were where I was woefully lacking.

Here is my first MG42 team. I have two more to make, as I only put together one sprue of support weapons. It is a monstrous looking weapon.

Here is my 120mm mortar. What a beast.


An 80mm mortar team. This is more likely to actually find itself onto the table.


A tank hunter team. It isn't my favourite pose, although I like the loader.

I love the pose of the Panzerschreck carrier.

Some infantry advancing cautiously past a field.

A squad of infantry.

Some Panzerfausts.

Looking forward to putting together the rest of my Germans. Heaven knows I need more.


Thursday, 6 June 2013

Dear Diary...

...JACKPOT! I won a few auctions on eBay this weekend. Three were from the same seller, and arrived yesterday while I was out. Upon arriving home at 2am after work, it was a welcome surprise. I thoroughly enjoyed refurbishing the old Panther, so decided to get some more of those projects.


Here we have a Tiger II in need of a repaint, and the removal of some interesting protrudements (chrome says this isn't a word...) but otherwise in good condition.

Elefant needs gun repair, wheel repair and a repaint.

Crusaders, Stuart, Panzer III, Wespe, Humber, T 34, and possibly Matilda need repaints, and some need their guns stiffened up.

The Lee needs work done on its wheels. 

The Sdkfz 251s (I think) need repaintsand a little work done on the front wheels, as does the Krupp Protze and the other transport vehicles. 

The Sdkfz 231 needs a new radio system attached, along with wheel repair and a repaint (although it will just be into grey again.
I saved a lot of money, had I bought them as kits, and all I need to do is a small amount of repair, which I enjoy doing. Hunting down some Elefant wheels may prove problematic, but I will give it a go. I am sorry if I outbid you for these. I just really, really wanted them.

Tuesday, 28 May 2013

100k Giveaway broadcast!!

You probably already know, but I am plugging this 100K giveaway shamelessly nonetheless! The first prizes look great, and I am definitely trying for some others as I broaden my model-making horizons.


Friday, 24 May 2013

Finished Achilles

Oh hi, guys! Long time, no blog. I have been just busy with other things, and my most recent projects have been somewhat neglected. After a few weeks of inaction, I made some progress yesterday, which included finally finishing my Achilles, a Sherman 76, and almost completing some German infantry.

The Sherman is from PSC. I lost the tank commander figure, so decided to make this one with a closed hatch, and pretty much no frills. I am still pleased with it. The decals are from a set of Skytrex allied stars that I picked up at Salute.


Now I look at it, I think I need to something more with the gun barrel on the Achilles. Maybe some kill stripes, or the camo pattern that hides its length. The decals are from the Airfix Cromwell model. One of these days I will put more markings on my vehicles, but at the moment I want them to be fairly generic.


I am very pleased with how the additional stowage turned out. I am happy with my drybrushing, and find it much more convincing than my previous, un-blogged efforts. One day I may post them, for a laugh.


The shells are the ends of cocktail sticks, super-glued in. As far as I am concerned, they will do. I have neither the patience, nor skill to try and make anything more intricate. Eventually I will find some figures that make a suitable crew. But until then, I am not phased by having an empty open turret.


Thursday, 2 May 2013

1000 views and some buildings.

I wasn't sure what I was expecting when making this blog. I am surprised I even have this many views. I guess it is here to try and gauge how much I improve at building things. I think I am going to start posting more WIPs with the intention of getting help and tips. I also hope to post more after action reports, but that will require my schedule to become more stable so I can become a regular at a gaming group.

As a celebration of my views, I present two buildings I consider finished enough to post. It was actually while painting these that I decided to try out acrylics. The black base coat is watered down Vallejo black. I then dry-brushed the other colours on. The first building is a Wills barn. I think it is generic enough to fit onto any battlefield. The roof lifts off, and is strengthened by plasticard supports.


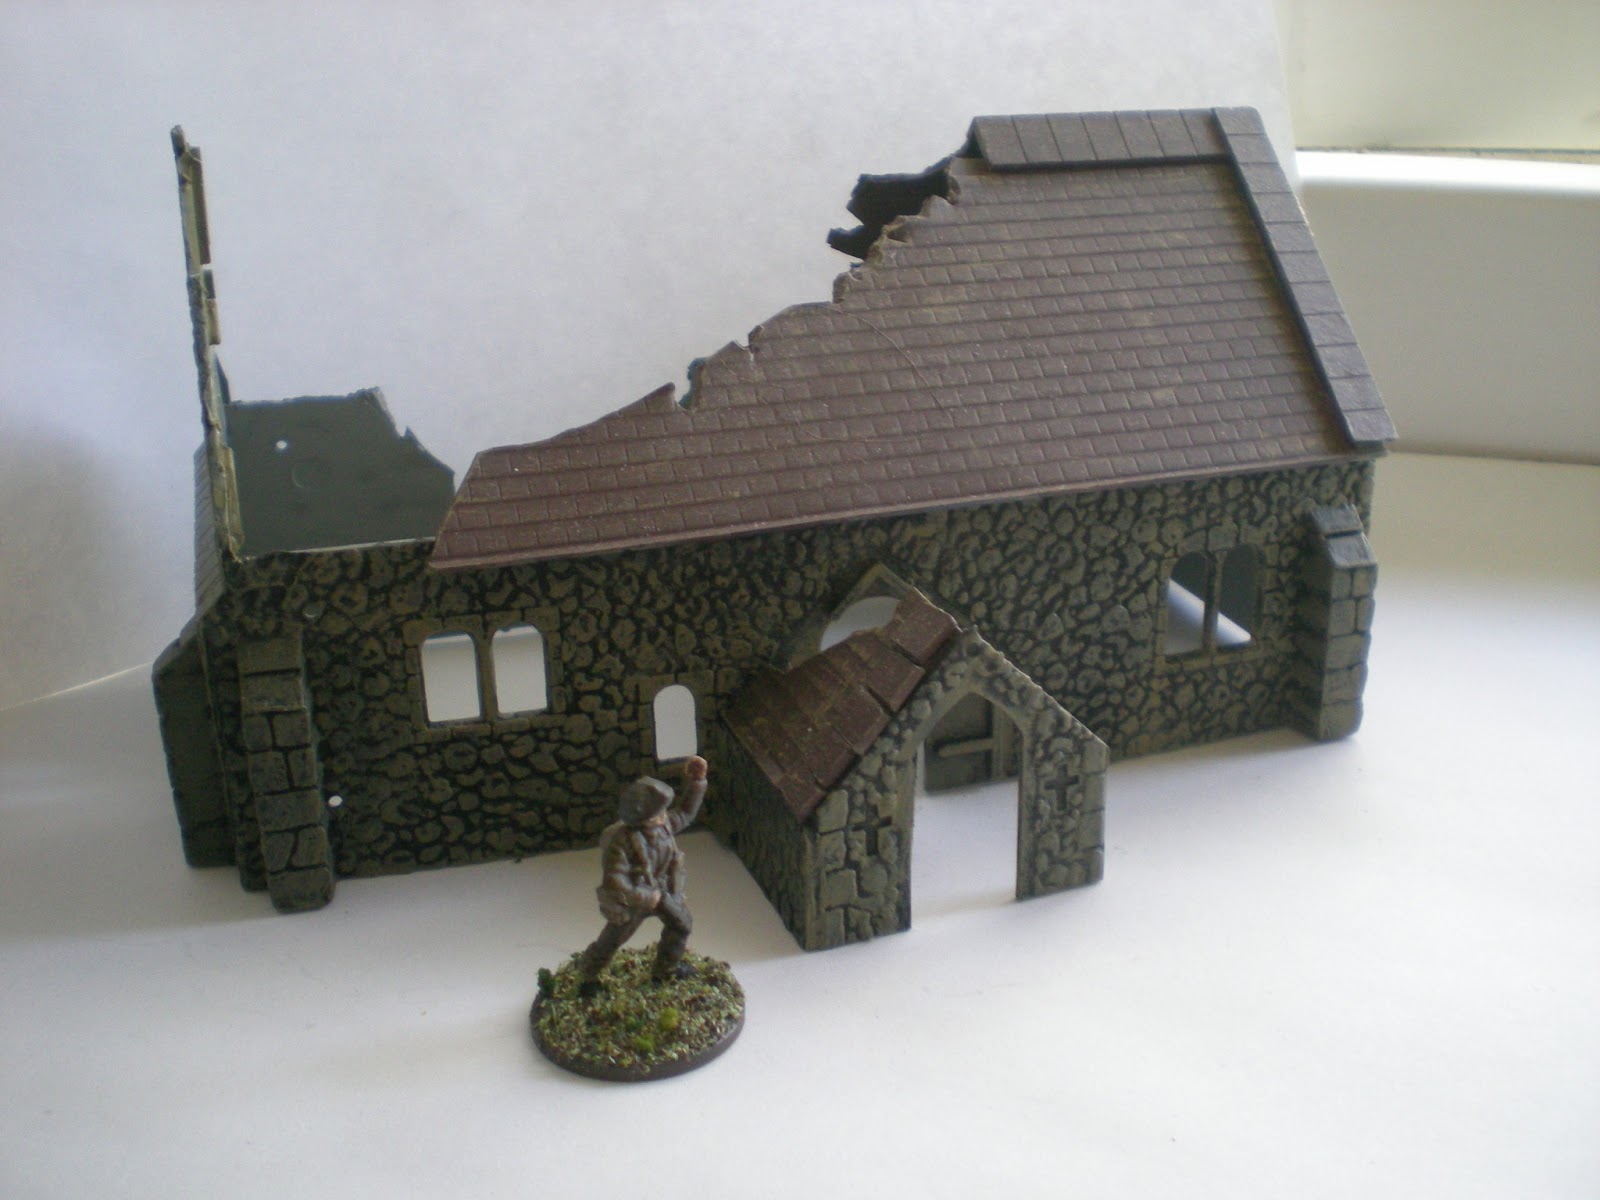
This is the famous Dapol church. I am pretty sure I got this for Christmas on the same year my Dad built us a model railway. I'm not sure if I ever made it properly. At some point I cut the roof and back wall up to make it a ruin for wargames. Since then it has sat in a box, unpainted for over ten years. I finally got my act together and painted it up. I am pretty happy with the result. It will serve well in my village.

Sunday, 28 April 2013

WIP Achilles part 2. Bed rolls?

My efforts to make the Achilles look presentable are slowly moving along. I decided to put some bed rolls, or rolls of stuff hanging from the sides. This helps cover some of the bare surfaces. This is the second tank I have tried this on. The other is a Sherman that hasn't been posted up here yet. 

I made the long one on the hull first. You can see remnants of my indecision about where to put the straps. It is unfortunate, but I hope paint will cover it, or I might use some filler to hide it better. These rolls started off as sausages of green stuff. I then flatten the ends by tapping them on my desk, and attach them onto the surface I want them on. Next comes the sculpting. I used the back edge of a craft knife to make the strap marks. I just roll the knife around the sausage a couple of times, and press gently in. 


The other indentations are created by using a cocktail stick, the pointed end facing the strap marks. I then do a few more dotted around the sausage to try and make it look natural.


I stick the end of the cocktail sticks into the ends of the sausage, and work it so there is a circle hole. I then squeeze it back together, leaving the hole visible, making it look like it is actually a roll of something.


We will see how they look when I get around to painting it all up. More stowage will follow. I am trying to work out what to use as shells to fit to the back of the turret. My only thought right now is of possibly using the ends of cocktail sticks.

Friday, 26 April 2013

Armourfast Achilles

Here is my attempt on the first Achilles. Excuse the shoddy knife-work. I did this before reading an article where a proper circular drill was used. I wish I had such a drill, instead of chipping away for hours with a knife.

The turret needed the middle part, so I could attach the turret to the hull. I cut away as much as I dared. Should be able to fit two men in there.


I didn't want a matching bar across the hull. It would limit the turret traverse by getting stuck on the legs of the crew. This way I think I have managed to find a way where the legs won't get in the way as much, and I can traverse the turret between 90 and 180 degrees.


This is how it looks together. I am tempted to take more off the hull.